Authentication Using Microsoft App Center
This article is part of the October Xamarin Best Practices Challenge
Featured in the Weekly Xamarin Newsletter
In an earlier post we learned how to Get Started with Microsoft App Center to monitor analytics and crashes for your app. Now we will take a deeper dive into implementing authentication within your app.
We will assume that you already have accounts setup for Azure and App Center. You also should have at least one app configured in App Center.
Create an Azure Active Directory B2C Tenant
Sign in to the Azure portal.
Next click ‘Create a resource’ at the top left of the side menu. Search for ‘Active Directory B2C’ and then select ‘Create’. Notice that the first 50,000 authentications per month are free.
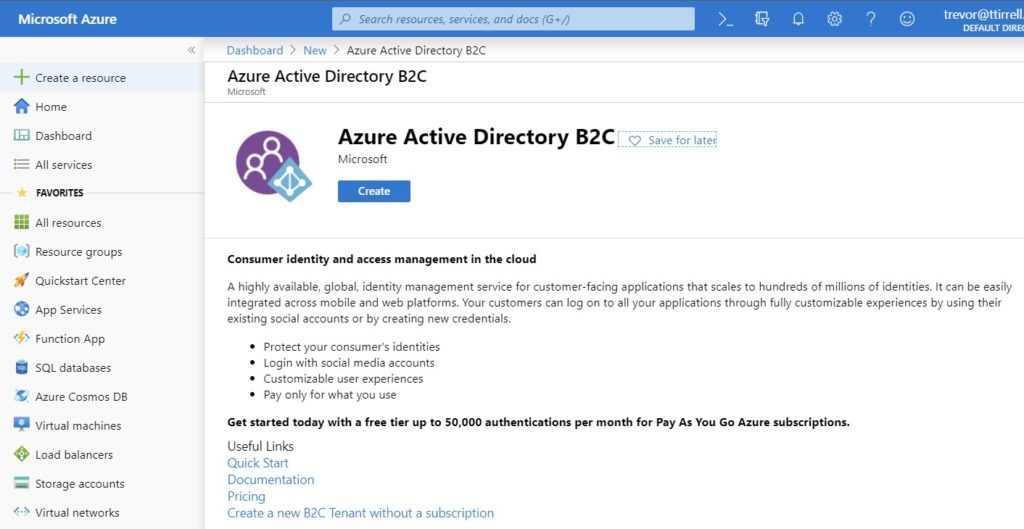
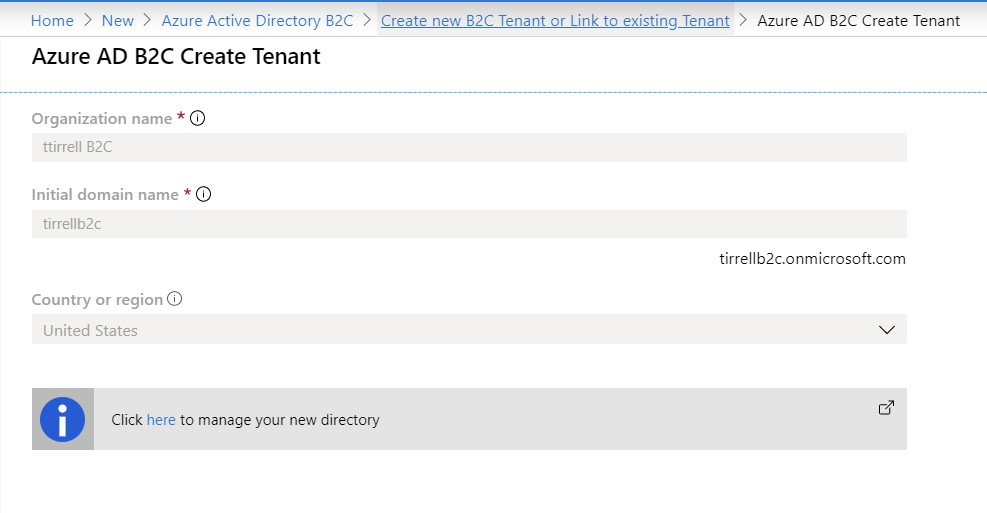
We want to select ‘Create a new Azure AD B2C Tenant’. Now enter an ‘Organization name’ and ‘Initial domain name’ and then click ‘Create’.
Wait for the Azure to finish creating the directory. Once it is completed click the link ‘Create new B2C Tenant or Link to existing Tenant’ toward the top of the page.
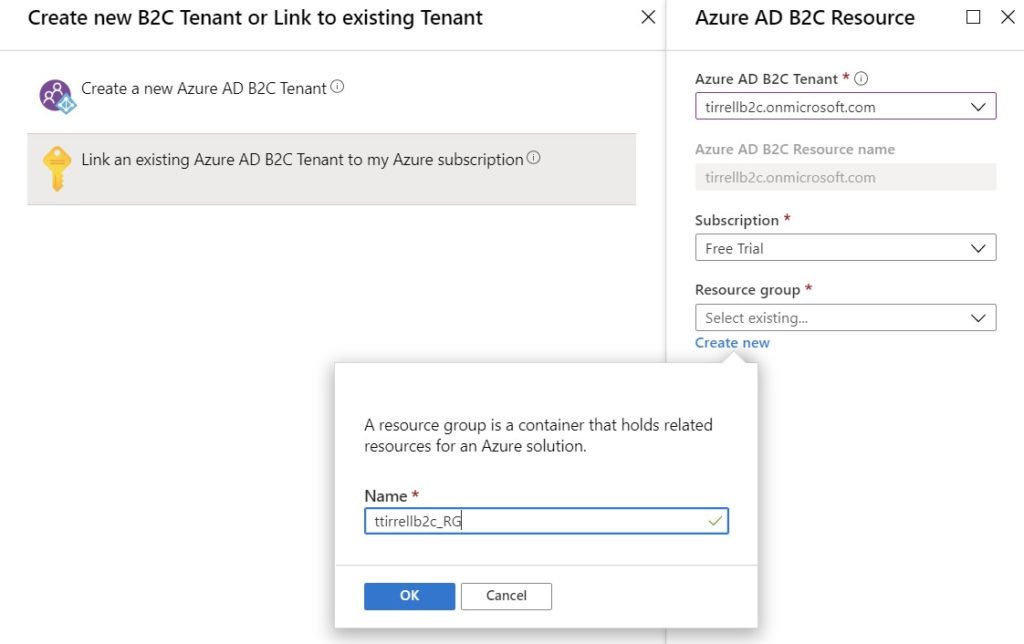
Now we want to choose ‘Link an existing Azure AD B2C Tenant to my Azure subscription’. Select the Tenant we just created, choose your Azure subscription and then click ‘Create new’ for the Resource group and enter a Name. Click ‘OK’. Now choose a ‘Resource group location’ and click ‘Create’.
Register an Application in Azure AD B2C
You will need to switch to the directory that contains your Azure AD B2C tenant by clicking on the ‘Directory + subscription filter’ in the top menu.
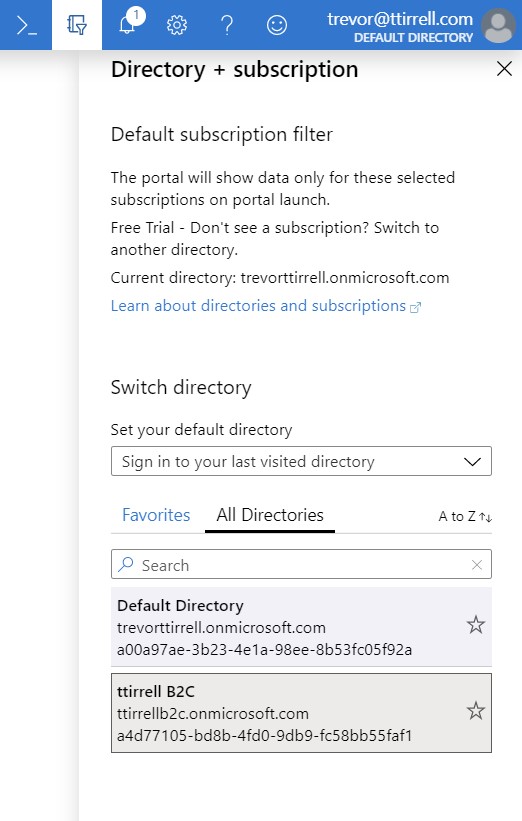
Search for Azure AD B2C and click on it. Click on ‘Applications’ under the ‘Manage’ section and click ‘+ Add’.
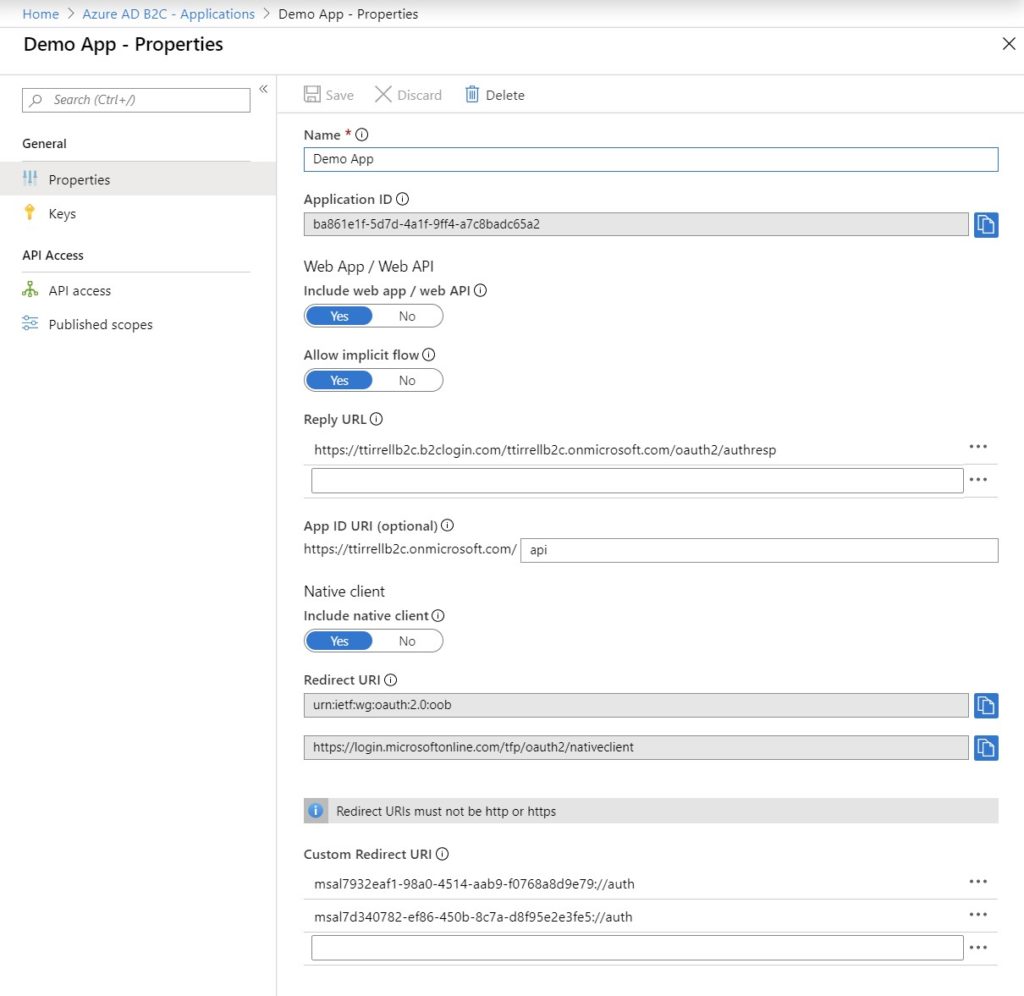
Type in a ‘Name’ and then toggle ‘Yes’ for ‘Include web app / web API’. We will come back to the ‘Reply URL’ section in a moment. For now enter api to the end of the ‘App ID URI (optional)’ field. Toggle ‘Yes’ for ‘Include native client’ and enter msal{appSecret}://auth for the ‘Custom Redirect URI’. Replace {appSecret}with the app secret for your App Center app. Add a separate uri for each app.
We will configure Microsoft Account for our identity provider. See this link if you would like to use a different identity provider.
Enter https://your-tenant-name.b2clogin.com/your-tenant-name.onmicrosoft.com/oauth2/authresp for the “Reply URL’. Now click ‘Create’. Make note of the ‘Application ID’, we will need this later.
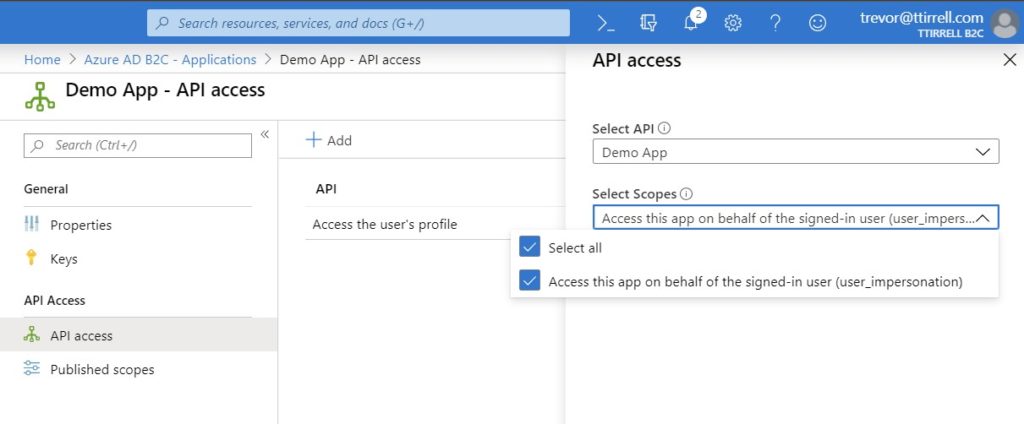
Click on the application you just created and then click ‘API access’ and ‘+Add’. Select the name of your application in the ‘Select API’ dropdown and ‘Access this app on behalf of the signed-in user (user_impersonation)’ in the ‘Select Scopes’ dropdown. Click ‘OK’
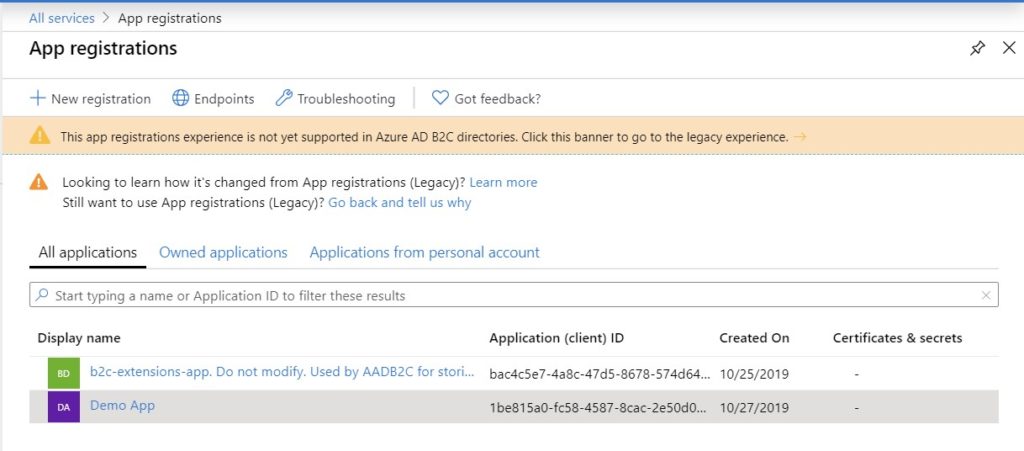
Now we need to head over to ‘All services’ in the side menu and search for ‘App registrations’. Click on the app you previously created.
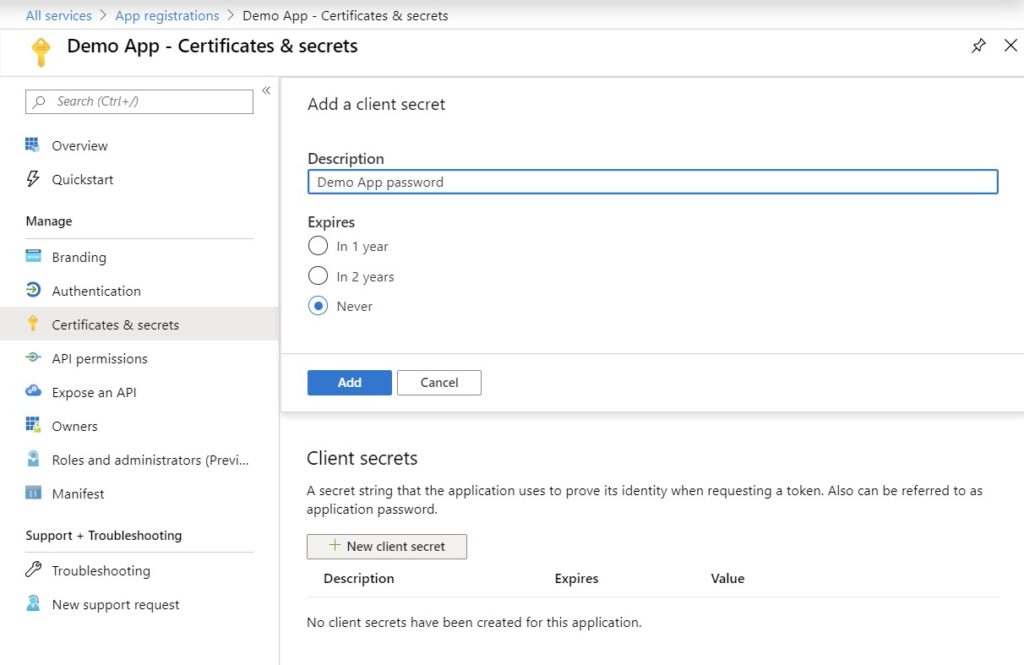
Then select ‘Certificates & secrets’ under the ‘Manage’ section. Click ‘+ New client secret’ and enter a description. Click ‘Add’. Make note of the application password shown in the Value column.
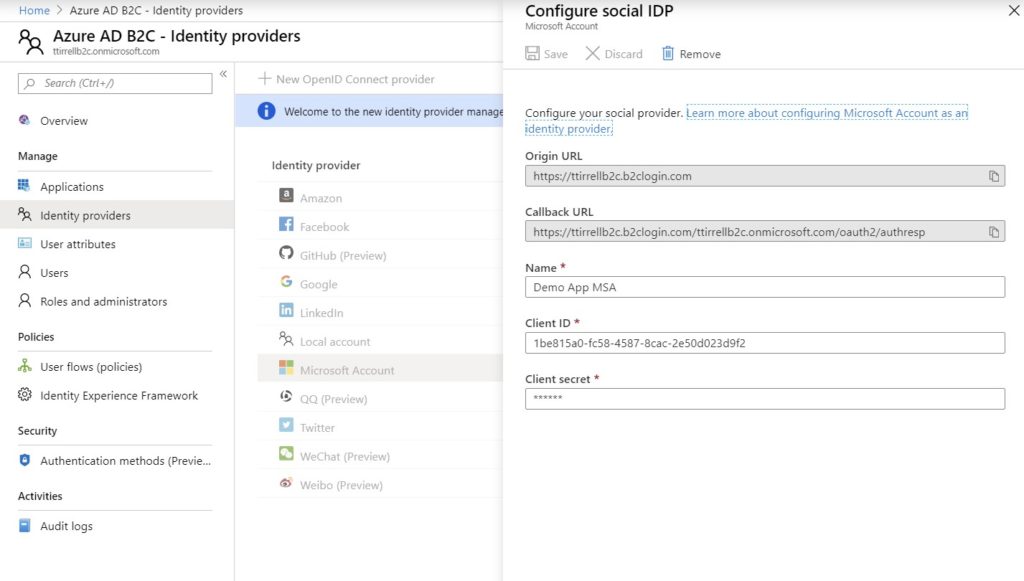
Search for ‘Azure AD B2C’ in the top search box. Next click on ‘Identity providers’ under the ‘Manage’ section. Click ‘Microsoft Account’ and enter a ‘Name’. Paste the values for ‘Client ID’ and ‘Client secret’ that we saved earlier. Click ‘Save’
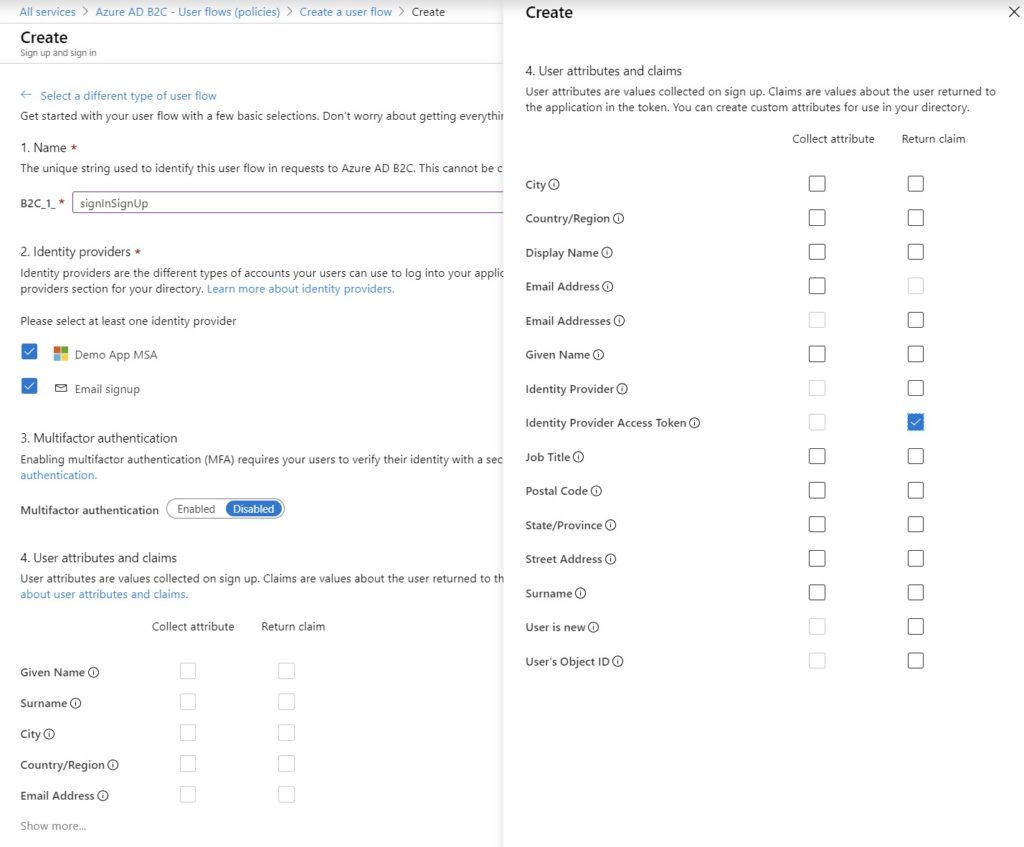
Finally click on ‘User flows (policies)’ under the ‘Policies’ section and click ‘+ New user flow’. Click the ‘Sign up and sign in’ link. Enter a Name and select the ‘Identity providers’ you want to use. ‘Multifactor authentication’ costs $0.03 USD per authentication. Click ‘Show more…’ under ‘User attributes and claims’ and select the attributes you want to “Collect” from the user and “Return” to your app. Click ‘OK’ and ‘Create’. Make note of the ‘Name’ you entered.
Configure App Center
Sign in to your App Center account.
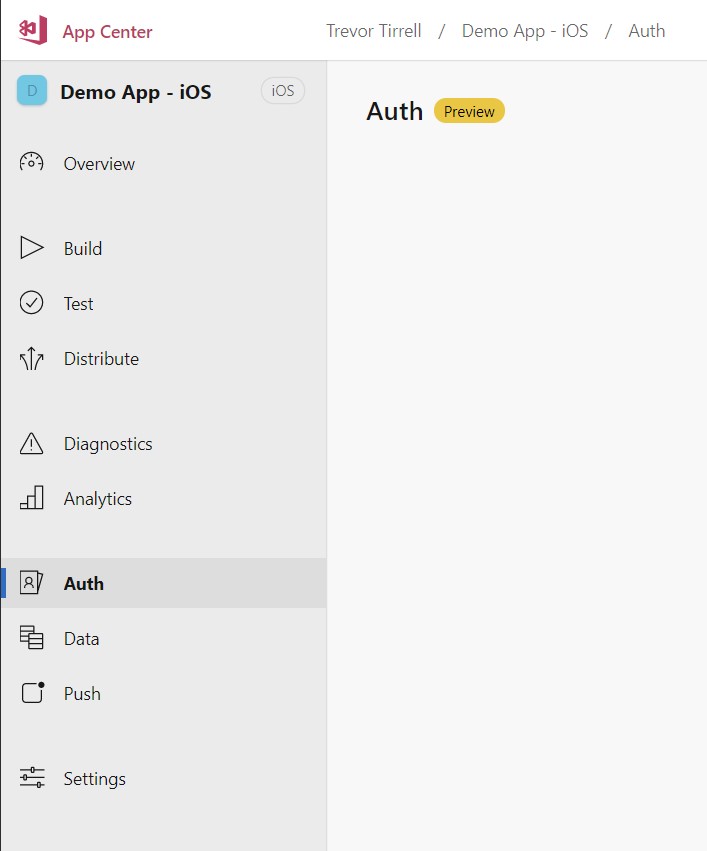
Select the app you want to configure and choose ‘Auth’ from the side menu. Click ‘Connect your Azure Subscription’.
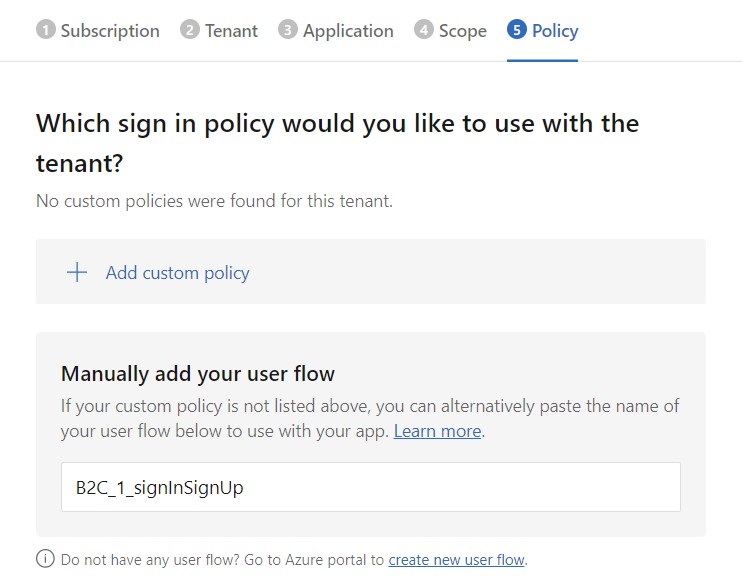
Select your Azure subscription and click ‘Next’. Select your Azure AD B2C tenant and click ‘Next’. Select your Azure app and click ‘Next’. Select the scope and click ‘Next’. Manually add the name of the user flow you made note of above. Click the checkbox and click ‘Connect’.
Add the App Center Auth SDK to Your App
Open Visual Studio and either create a new app or select an existing app.
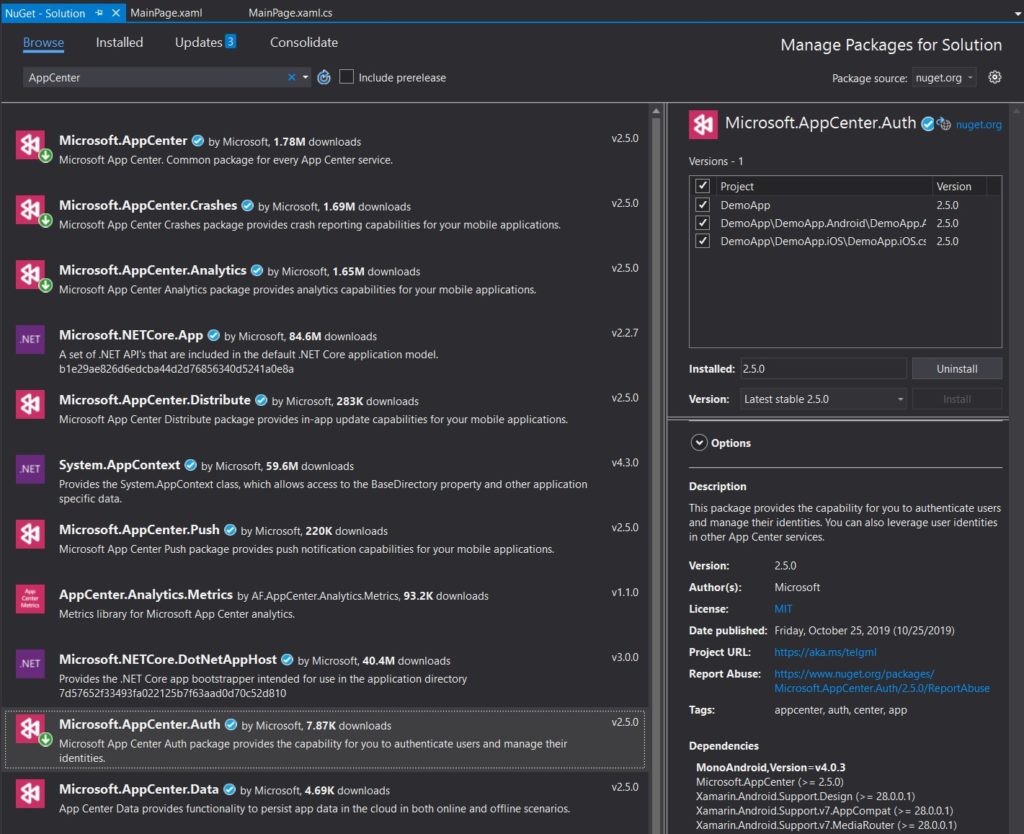
Right click on your Solution and select ‘Manage NuGet Packages for Solution…’. Brows for ‘AppCenter’ and install both Microsoft.AppCenter and Microsoft.AppCenter.Auth for all your projects.
For Xamarin.Forms apps you will want to add the following ‘using’ statements into our App.xaml.cs file.
using Microsoft.AppCenter;
using Microsoft.AppCenter.Auth;
You will need to navigate to each of the apps you’ve created in App Center to find the ‘App secret’ for each one. Make sure to replace {Your App Secret} with the actual value for your application in each of the code blocks below.
We need to copy and paste the following into the OnStart() method within the same file.
AppCenter.Start("ios={Your iOS App secret here};" +
                  "android={Your Android App secret here}",
                  typeof(Auth));
Android
For Android you must add the following element to the project’s AndroidManifest.xml file within the application tag.
<activity android:name="com.microsoft.identity.client.BrowserTabActivity>
     <intent-filter>
         <action android:name="android.intent.action.VIEW" />
         <category android:name="android.intent.category.DEFAULT" />
         <category android:name="android.intent.category.BROWSABLE" />
         <data
             android:host="auth"
             android:scheme="msal{Your App Secret}" />
     </intent-filter>
</activity>
iOS
For iOS you will need to right click on the Info.plist file and select ‘View Code’. Copy and paste the following code:
<key>CFBundleURLTypes</key>
<array>
     <dict>
         <key>CFBundleTypeRole</key>
         <string>Editor</string>
         <key>CFBundleURLName</key>
         <string>$(PRODUCT_BUNDLE_IDENTIFIER)</string>
         <key>CFBundleURLSchemes</key>
         <array>
             <string>msal{APP_SECRET}</string>
         </array>
     </dict>
</array>
Next open the project’s Entitlements.plist and check Enable Keychain under the Keychain Entitlement. Then click ‘<Add New> and type com.microsoft.adalcache in the form, then hit Enter and Save the file.
Add Code to Authenticate Users
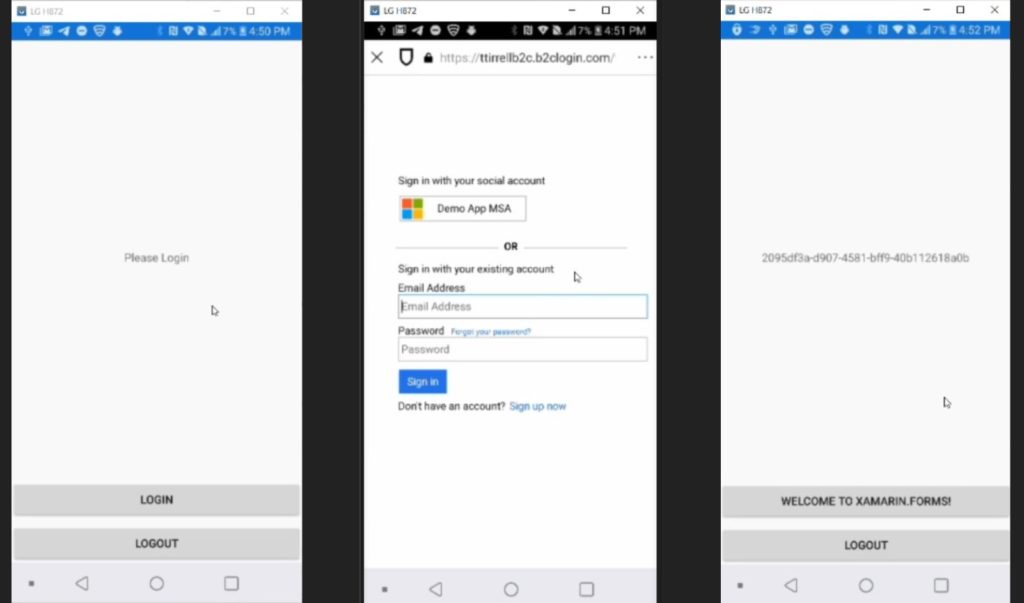
Here is some sample code you can test in your XAML file:
<StackLayout>
     <Label x:Name="loginText" Text="Please Login"
         HorizontalOptions="Center"
         VerticalOptions="CenterAndExpand" />
     <Button x:Name="loginButton" Text="Login"
             Clicked="loginButton_Clicked"/>
     <Button x:Name="logoutButton" Text="Logout"
             Clicked="logoutButton_Clicked"/>
 </StackLayout>
In your loginButton clicked event you will want to call a method to SignIn. And in the logoutButton clicked eventy you will want to call a method to SignOut. Here is what that might look like.
private async void loginButton_Clicked(object sender, EventArgs e)
         {
             await SignInAsync();
         }
private void logoutButton_Clicked(object sender, EventArgs e)
     {
         SignOut();
     }
Now create your SignInAsync() method
async Task SignInAsync()
{
    try
    {
        // Sign-in succeeded.
        UserInformation userInfo = await Auth.SignInAsync();

        loginText.Text = userInfo.AccountId;
        loginButton.Text = "Welcome to Xamarin.Forms!";
    }
    catch (Exception e)
    {
        // Do something with sign-in failure.
        loginText.Text = "Unable to Login";
        loginButton.Text = "Try Again";
    }
}
Finally create your SignOut() method
void SignOut()
{
     Auth.SignOut();

     loginText.Text = "You are now signed out";
     loginButton.Text = "Please Login";
}
You will need to use an actual device to test authentication. An emulator or simulator will not work. Additionally your iOS device needs to be provisioned first (see references below).
Useful Links
- Azure Portal
- Microsoft App Center
- Getting Started with App Center Auth Service documentation
- Create an Azure Active Directory B2C tenant documentation
- Setting up your Identity Provider documentation
- Device provisioning for Xamarin.iOS documentation
7 thoughts on “Authentication Using Microsoft App Center”
it’s possible use multiple providers at the same time ?? Facebook and Google, for example.
Thanks
Yes, you will need to setup each third-party identity provider separately by following the directions here: https://docs.microsoft.com/en-us/appcenter/auth/getting-started#set-up-the-redirect-uri-on-your-identity-provider
Your login screen in your app will automatically display a button for each one you setup.
Incredible. Thanks Trevor for your help and time. 🙂
This is a great post thanks for taking the time. I was having problems msal and Xamarin so I decided to switch over to appcenter auth. It was very easy to follow the instructions and get up and running. Unfortunately, I don’t think auth is quite ready for prime time. I discovered that if you delete a user after they have logged in they remain credentialed and can gain access to resources if you have removed them for Active directory. I also couldn’t easily find documentation on how to reset password etc… IMHO auth needs a bit more work by the Microsoft Product team before it’s ready for a real world application. After the diversion I am moving back and seeing if I can get Xamarin forms to work nicely with msal. Thanks for the post!
I echo Brady’s comments… Also, I don’t know if AppCenter Auth / Azure AD B2C Auth works with MS GRAPH in Xamarin. I was never able to create a token issued for using MS GRAPH. If you have any inputs on this, pls do share!
Appreciate your post, it’s useful for many !!
Now that AppCenter has removed the Auth feature in favor of implementing everything directly through Azure B2C, I’d be interested to see you do a follow-up post where you rework this same topic but without using AppCenter. There seems to be a severe lack of a single source of cohesive content walking through the creation of a basic API, securing it with B2C and accessing it with a simple Xamarin or UWP mobile client app.
Sorry Chris. I’ve been receiving a lot of spam in my comments and just found this. I was able to get Azure B2C working, but you are correct there is no single source for how to do it. I had to piece together information from several places. I will try to put something together for you.